
Agents
Creating an agent
Add a new agent to your workspace from a template.
Creating an agent
You get your first agent during onboarding. To add more (on Pro), use the Agents page.
Steps
- In the left rail, under Workspace settings, choose Agents.
- Click New agent.
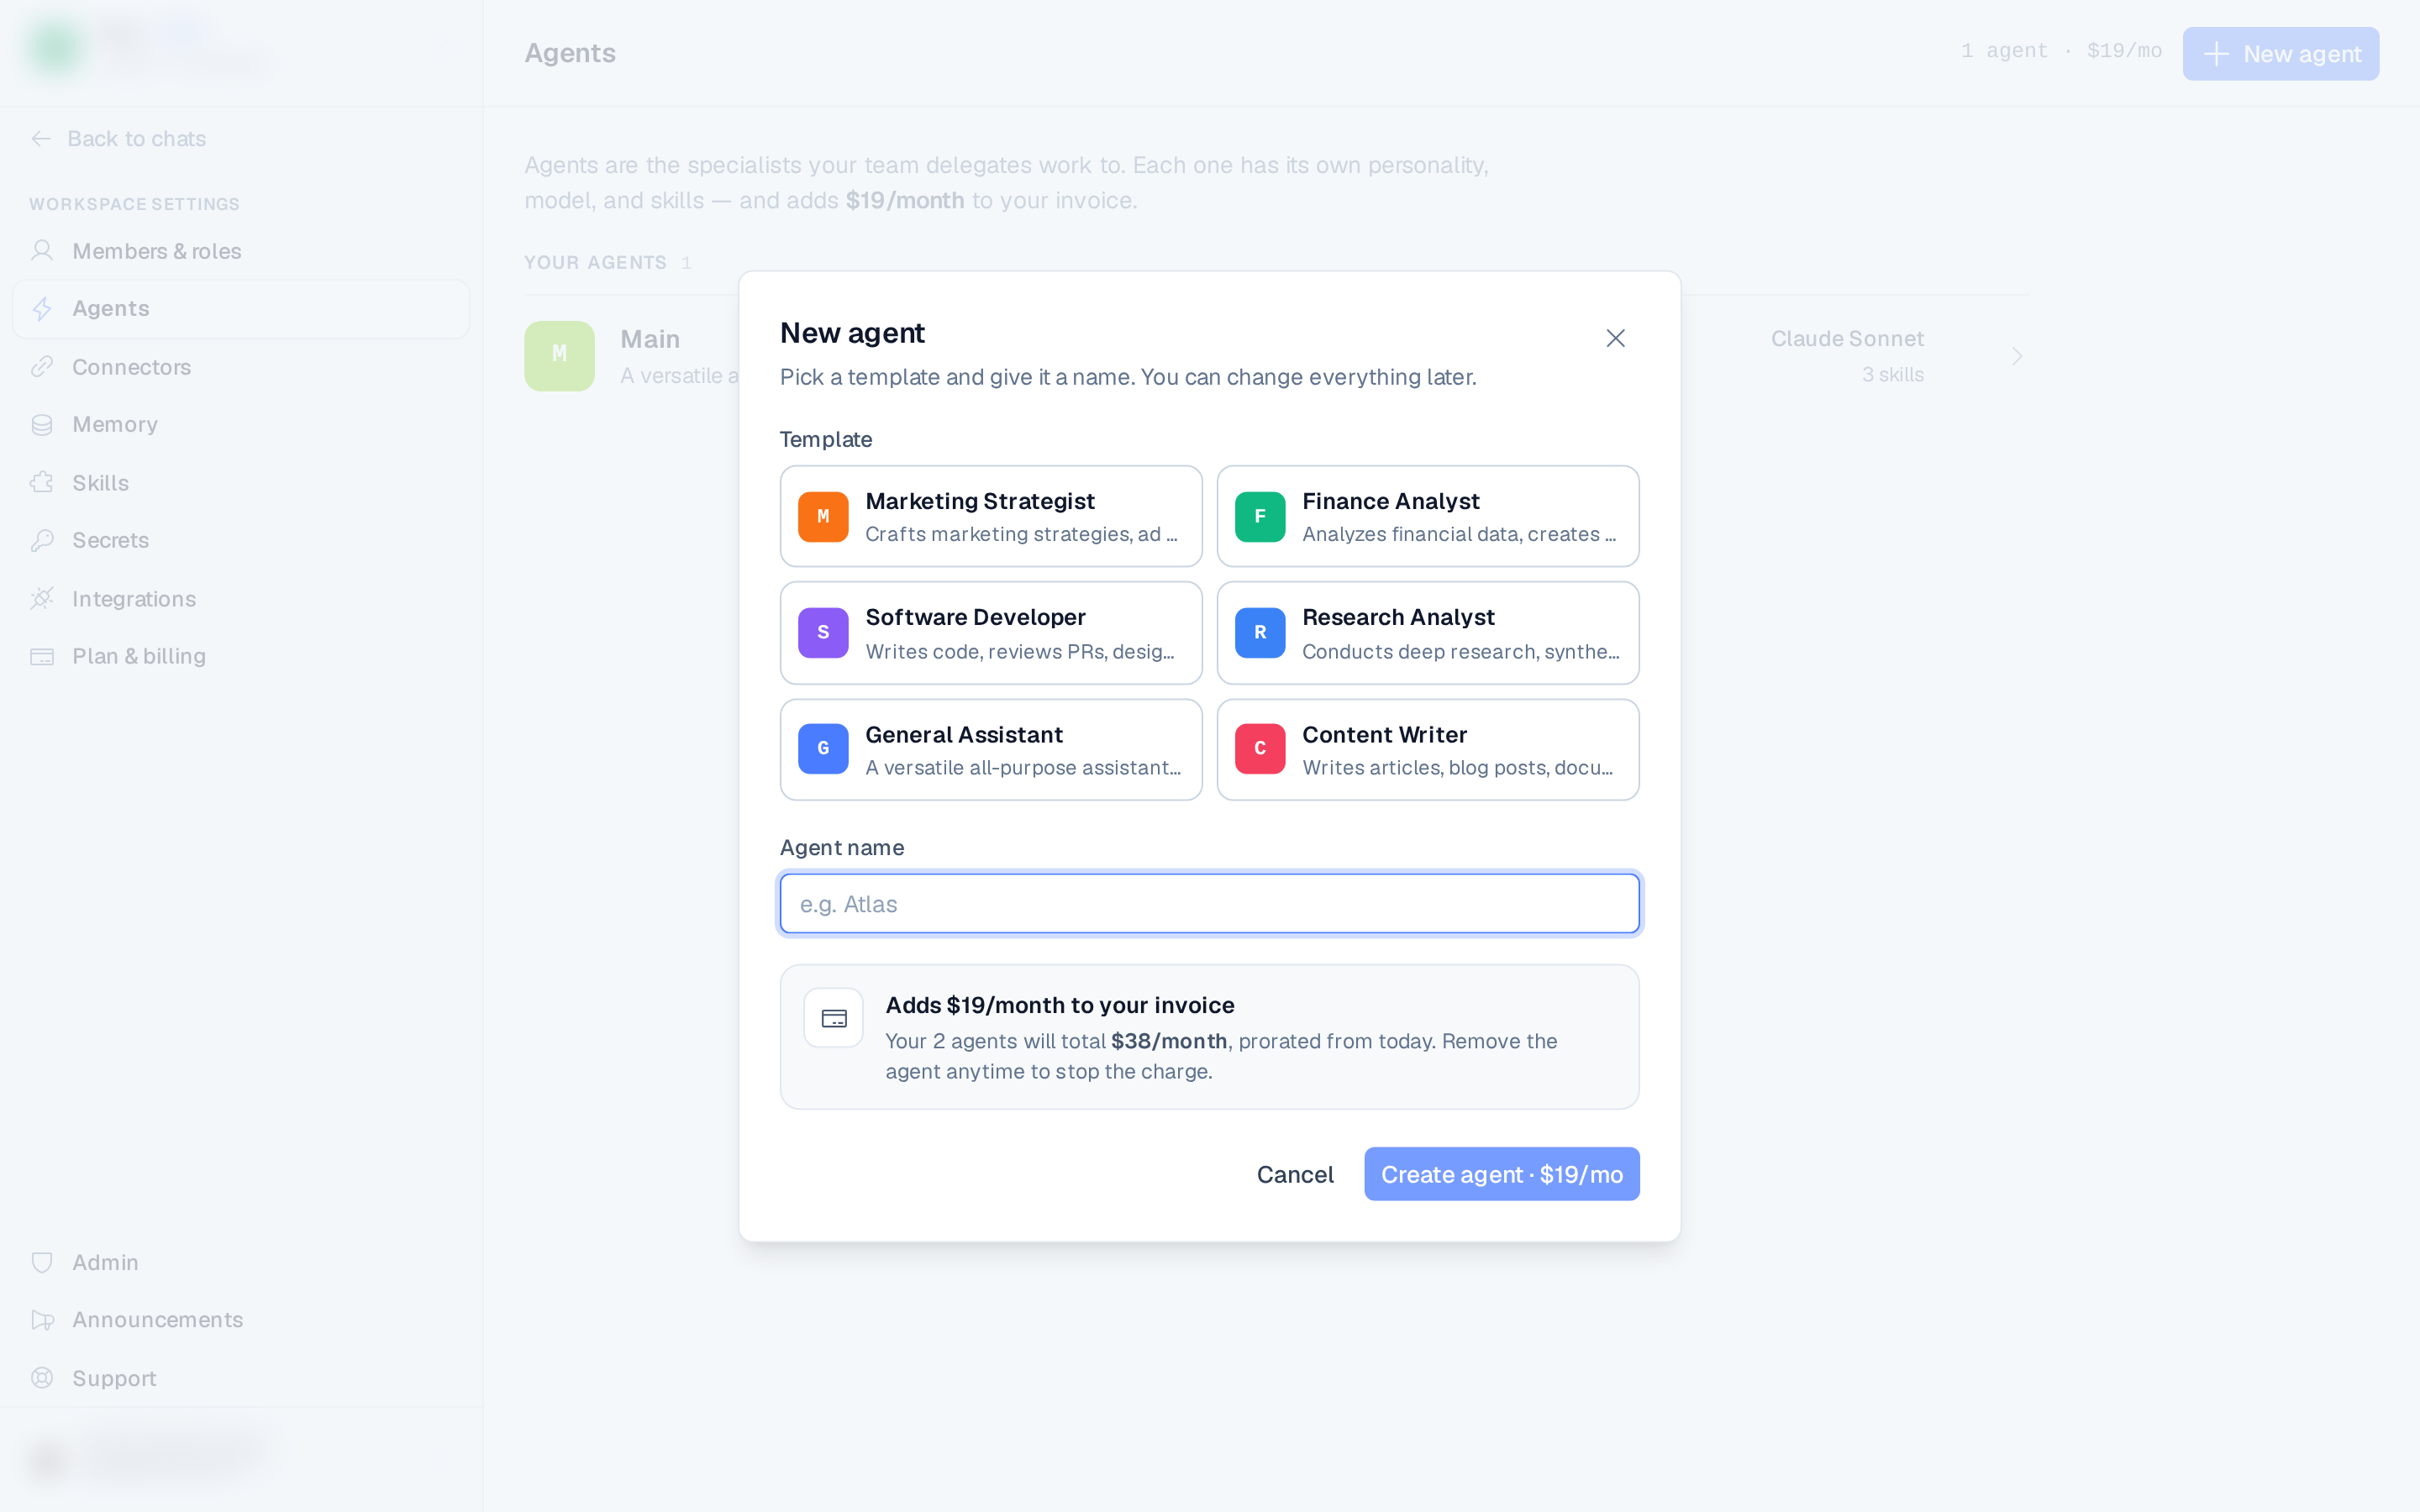
- Pick a template. Each one starts the agent with a fitting personality and name:
- Research Analyst — deep research, synthesis, and detailed reports.
- Software Developer — writes code, reviews PRs, and automates workflows.
- Marketing Strategist — strategies, ad copy, social content, and growth plans.
- Finance Analyst — financial analysis, reports, budgets, and summaries.
- Content Writer — articles, blog posts, documentation, and creative content.
- General Assistant — a versatile all-purpose agent.
- Give it an agent name (the template's name is filled in for you — change it to anything you like).
- Click Create agent. You can change the template's personality, model, skills, and everything else afterward.
You can change everything later — the template only sets a starting point.
Billing
Agents within your plan's included count are free. Beyond that, each agent adds $12/month on Pro ($8/month on Business), prorated from the day you create it. The dialog tells you whether the agent is included or what the add-on costs before you confirm. Remove the agent anytime to stop the charge — deleting it credits the add-on back.
On the Free plan you can have a single agent. To run more, upgrade to Pro.
After creating
- Set the agent's model and personality.
- Turn off memory if the agent shouldn't remember facts and preferences between conversations — it's on for new agents.
- Install skills and enable the ones this agent should use.
- Grant it access to connected accounts and secrets it needs.
- Start a chat or create a task to put it to work.