Overview
Available on
Free, Pro, and Enterprise plans
Setup time
About 5 minutes
What you need
A Discord account and a server where you have admin rights
Bot model
Bring Your Own Bot. You create the bot, BetterClaw runs it.
BetterClaw uses a Bring Your Own Bot model for Discord. You create a Discord application in the Discord Developer Portal, generate a bot token, and paste it into BetterClaw. We handle the gateway connection, message routing, and agent responses from there. The bot runs under your name and your branding, and you can disconnect it at any time.
Once connected, your agent responds to @-mentions in any channel the bot can see, and to direct messages from users you allow.
What you will do
- Create a Discord application and bot in the Discord Developer Portal
- Enable the Message Content Intent on your bot
- Copy the bot token
- Paste the token into BetterClaw and pick which agent should answer
- Add the bot to your Discord server through the install link
- Send a test message and watch your agent reply
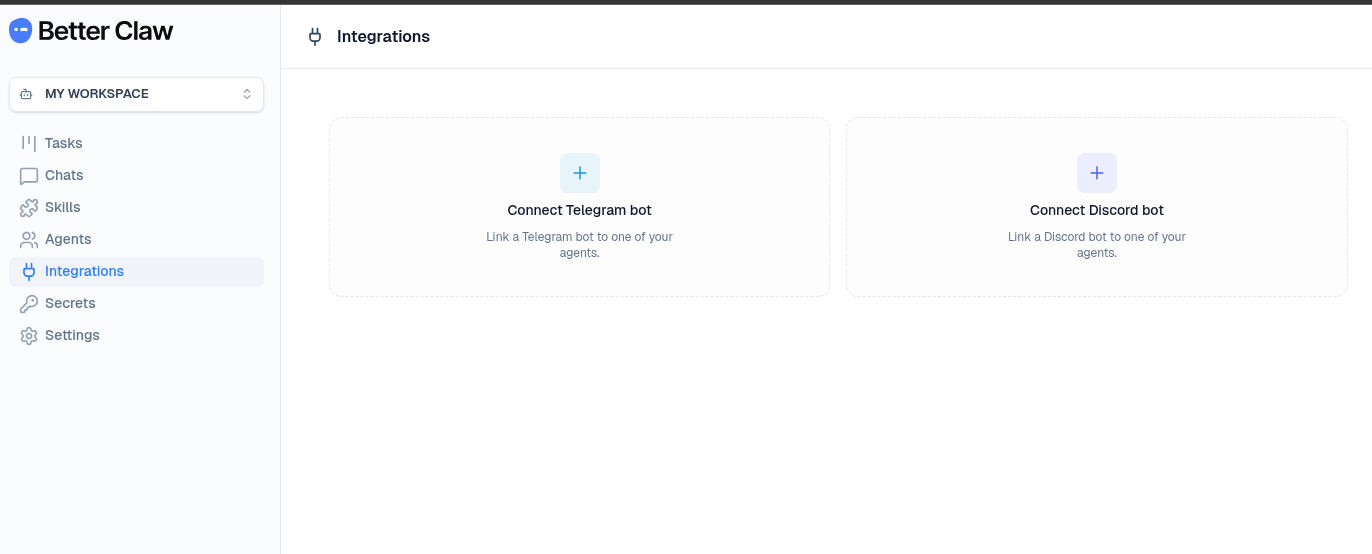
Step 1: Open the Discord Integration in BetterClaw
Log in to BetterClaw and go to Integrations from the left sidebar. You will see two cards: Connect Telegram bot and Connect Discord bot. Click Connect Discord bot. Keep this tab open. We will come back to it once we have a token.
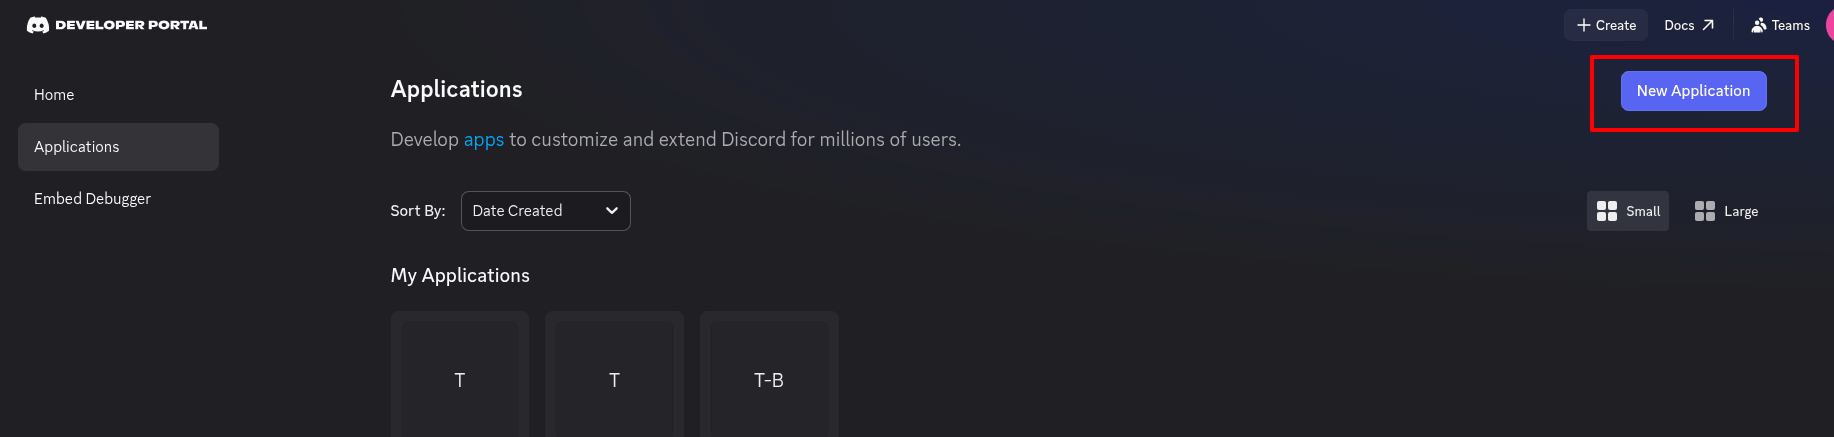
Step 2: Create a Discord Application
Open a new tab and go to discord.com/developers/applications. Sign in to Discord if you are not already logged in.
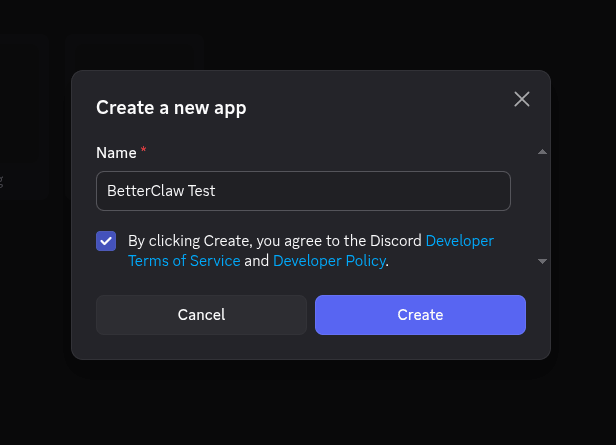
Click the New Application button at the top right. A dialog opens asking for a name.
Type a name for your bot. This is what users will see in Discord, so pick something that matches your brand. For example, "Acme Support Bot" or "Acme Assistant". Tick the box agreeing to the Discord Developer Terms of Service and Developer Policy, then click Create.
Discord may ask you to solve a captcha if this is your first time creating an app. That is normal.
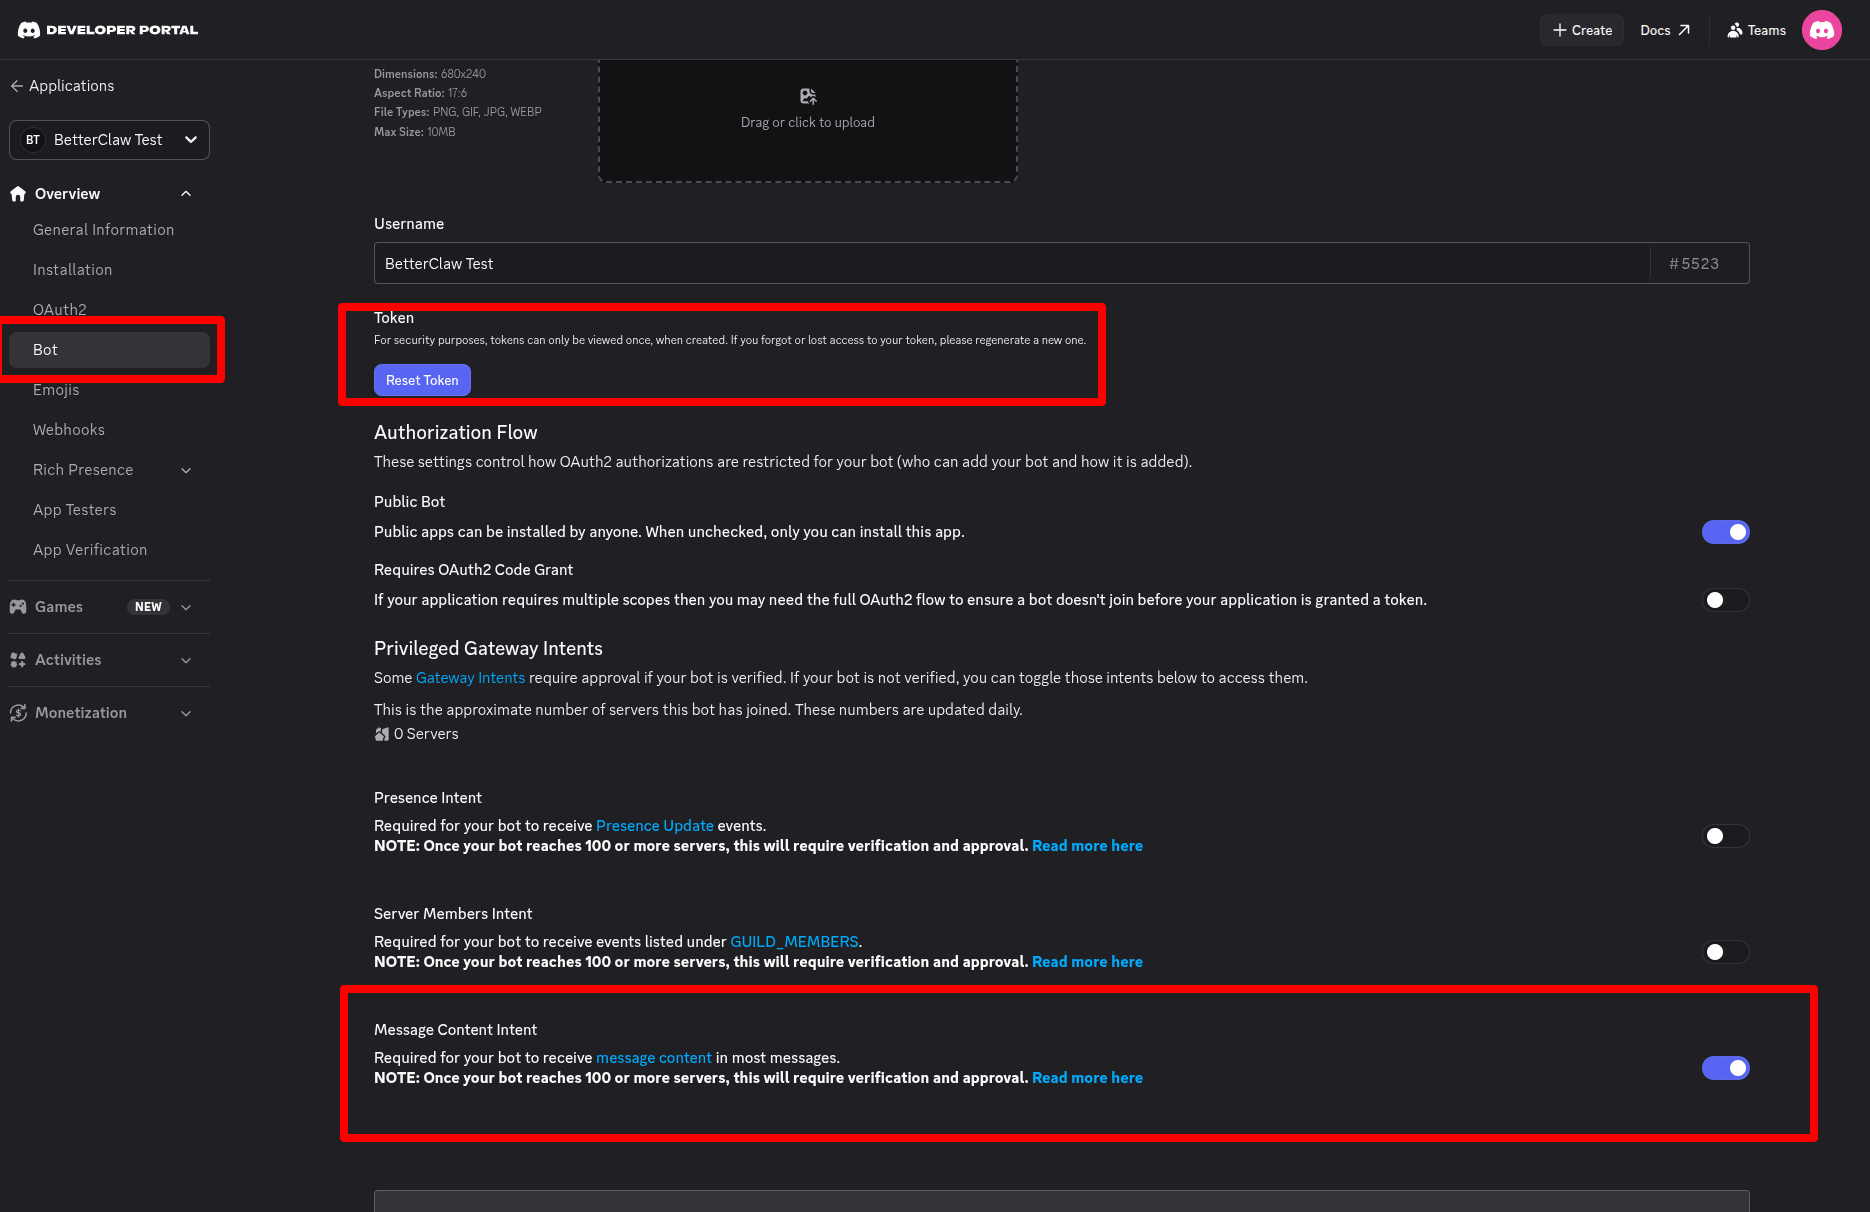
Step 3: Enable Message Content Intent
After your app is created, you land on the General Information page. From the left sidebar of the Developer Portal, click Bot.
Discord automatically creates a Bot user for every new application now, so you do not need to add one manually. Scroll down to the Privileged Gateway Intents section.
You will see three toggles:
- Presence Intent — leave OFF
- Server Members Intent — leave OFF
- Message Content Intent — turn ON
Message Content Intent is required so your bot can read what users write to it. Without this, the bot will see that someone messaged it but will not see the actual text, and your agent will not be able to respond meaningfully.
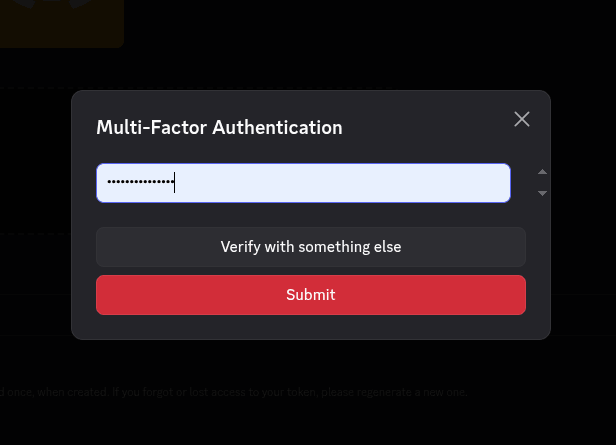
Scroll to the bottom of the page and click Save Changes. Discord will prompt you for your password to confirm. Enter it and save.
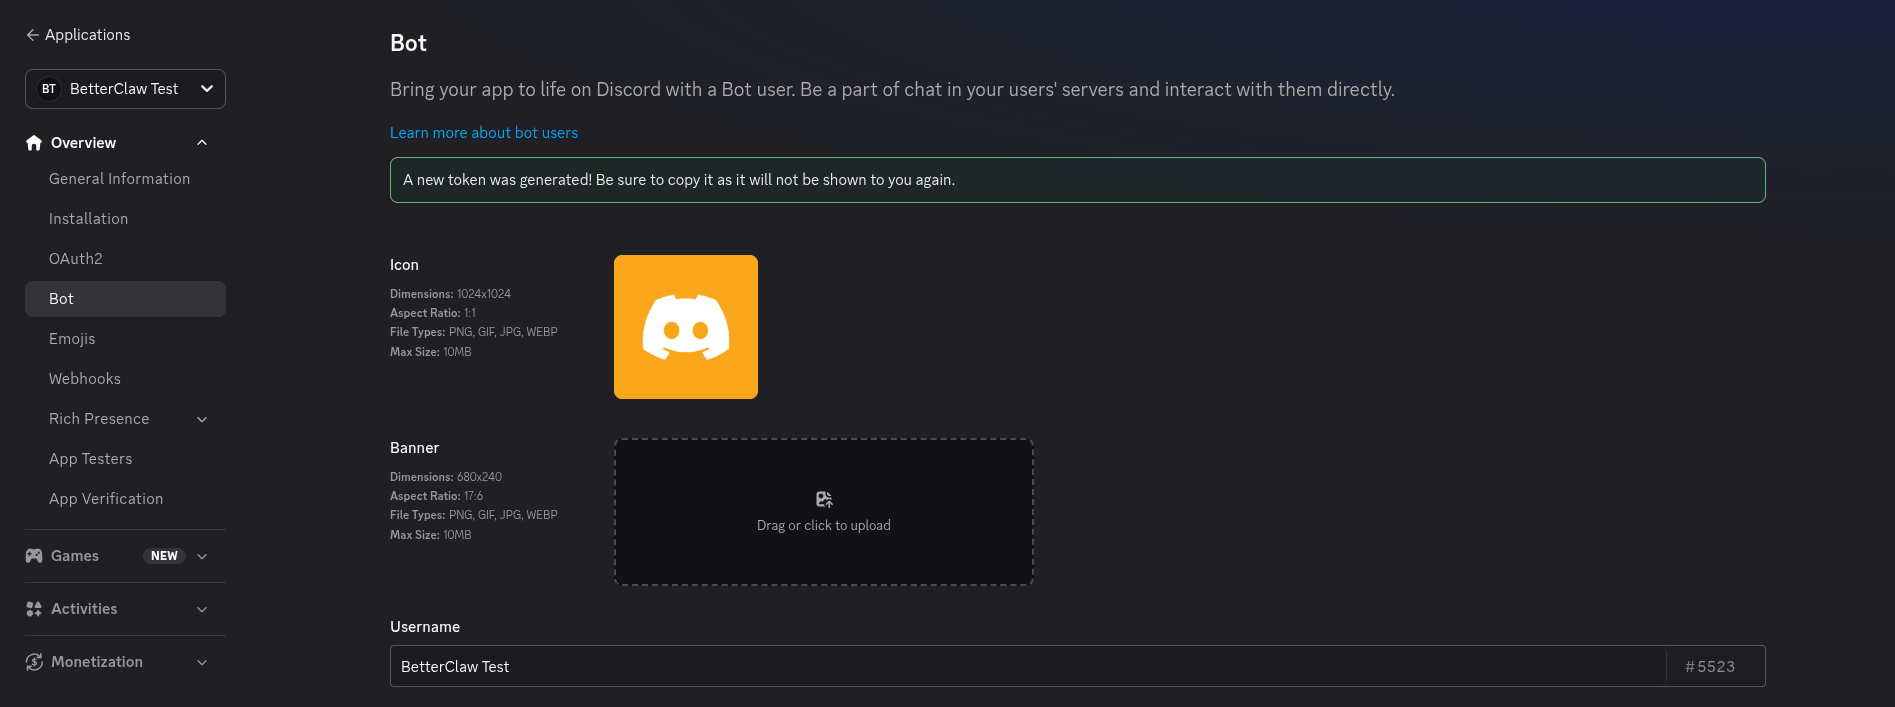
Step 4: Copy Your Bot Token
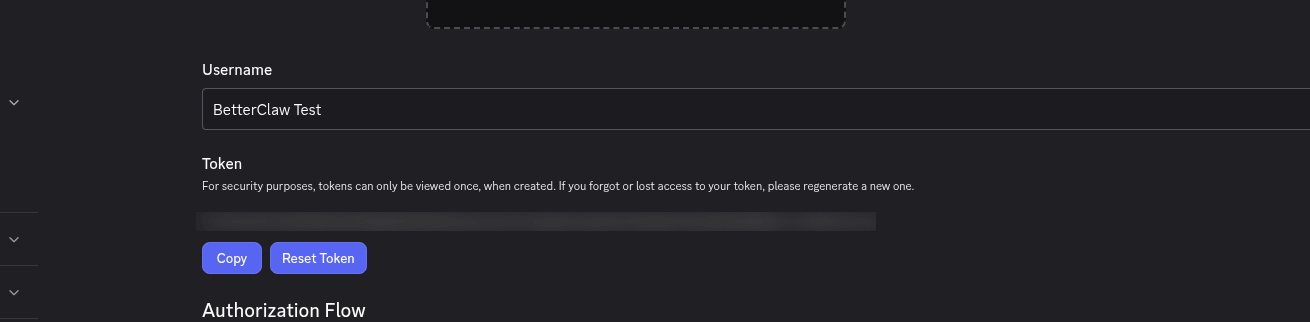
Scroll back up to the top of the Bot page. Find the Token section, just below the Username field.
If this is a new application, click Reset Token. Discord will ask you to confirm and may prompt for your password again. After confirming, your bot token appears as a long string of letters, numbers, and dots.
Click Copy. The token is now on your clipboard.
Treat this token like a password. Anyone who has it can control your bot. Do not paste it into chat, screenshots, or git commits. Discord shows the token once, right after you reset it. If you lose it, you will need to reset it again, which will disconnect the bot from BetterClaw and force a reconnection.
Step 5: Paste the Token into BetterClaw
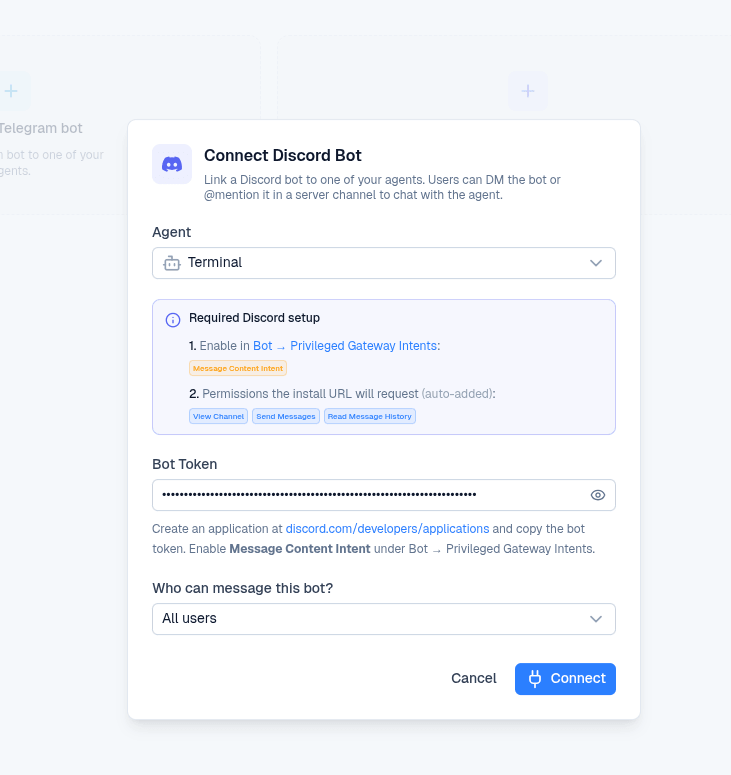
Switch back to the BetterClaw tab where the Connect Discord Bot dialog is open. You will see the following fields:
Agent
Pick which agent should respond on Discord. Each Discord bot connects to exactly one agent. If you want a different agent for a different Discord server, you will need to create a separate Discord application and connect it to that agent.
Bot Token
Paste the token you copied from the Discord Developer Portal.
Who Can Message This Bot?
Choose who is allowed to interact with your agent through this bot. You can change this later from the BetterClaw dashboard:
| Option | Behavior |
|---|---|
| All users | Anyone in any server the bot is in, plus anyone who DMs the bot. Best for public-facing bots. |
| Server members only | Only people who share a server with the bot. DMs from non-server members are ignored. |
| Specific Discord user IDs | An allowlist of Discord user IDs you trust. Only these users can interact with the bot. |
Click Connect. BetterClaw validates the token with Discord and shows a "Discord bot connected" confirmation in the bottom right.
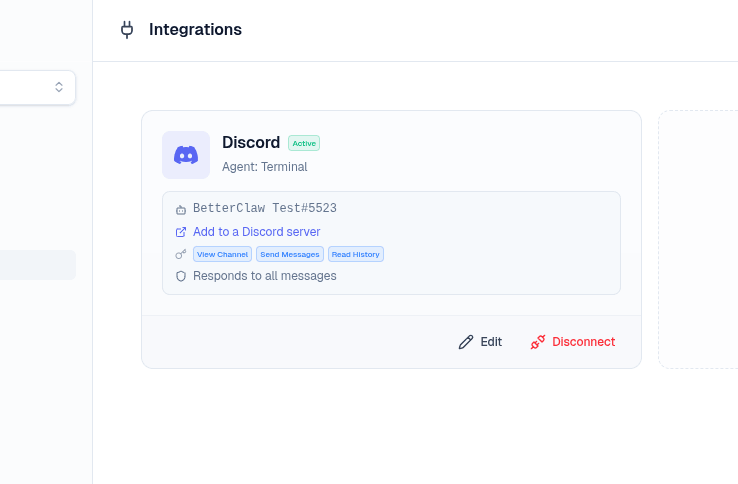
After connecting, the Discord card on the Integrations page shows the bot as Active, displays the agent it is wired to, and includes an Add to a Discord server link plus Edit and Disconnect buttons.
Step 6: Add the Bot to Your Discord Server
The bot now exists, but it is not in any server yet. On the Discord card in BetterClaw, click Add to a Discord server.
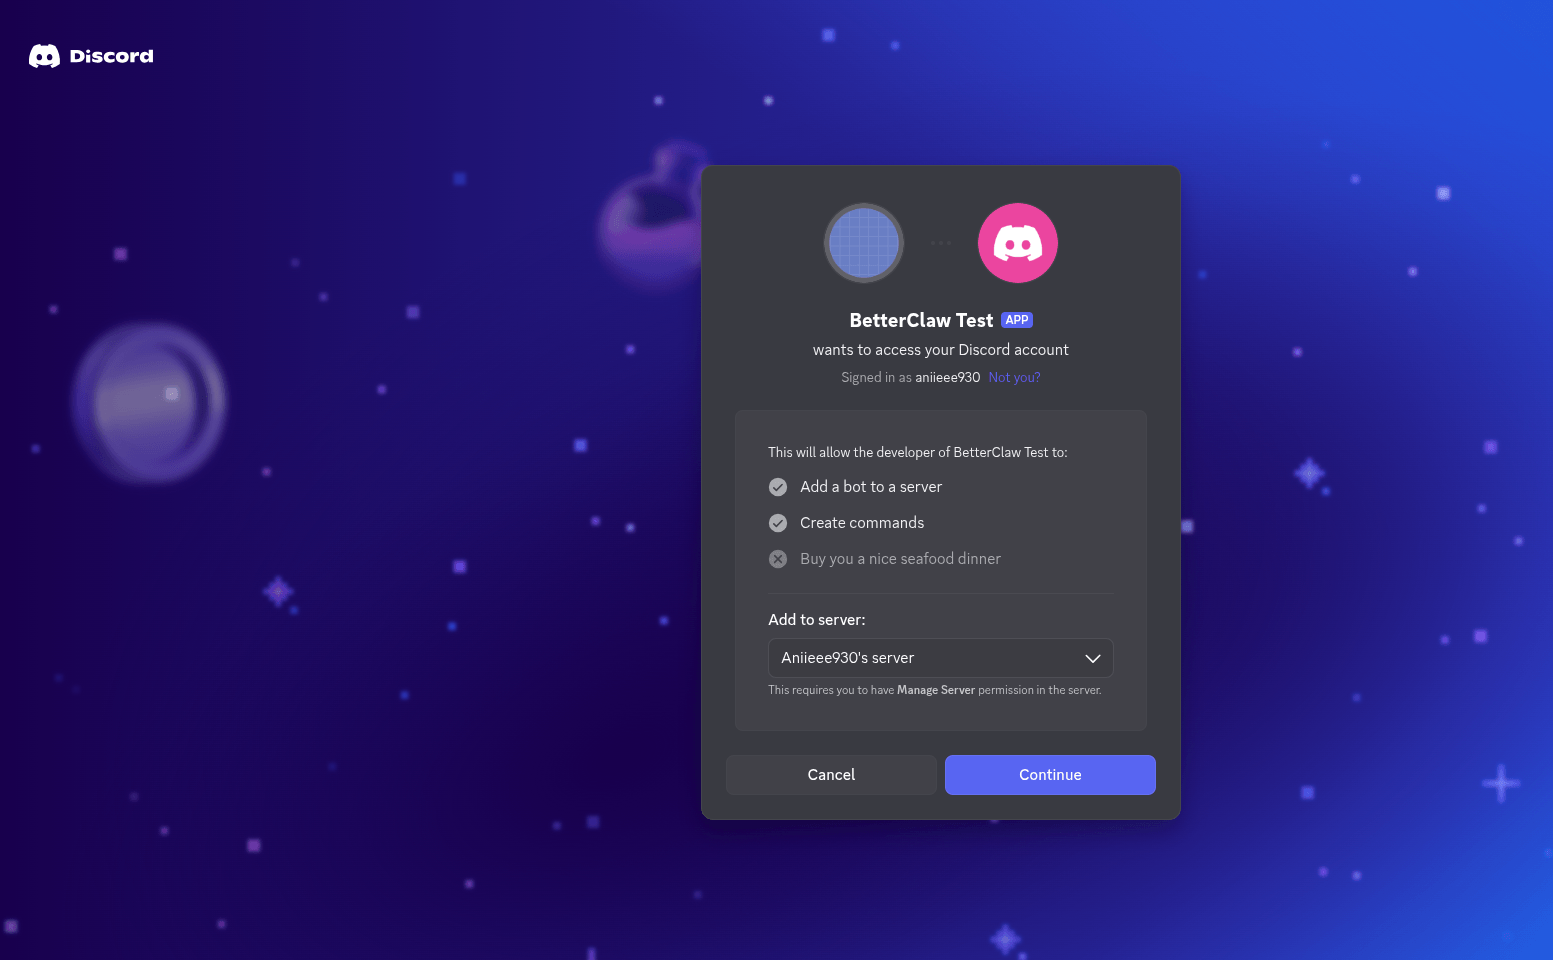
A Discord OAuth page opens in a new tab. It will ask you to confirm three things:
- Add a bot to a server. Pick the server you want from the dropdown. You must have Manage Server permission on that server, otherwise it will not appear in the list.
- Permissions. The install link automatically requests the minimum needed: View Channels, Send Messages, and Read Message History. Leave all three checked.
- Click Authorize and complete any captcha if shown.
On the next screen, Discord shows the exact permissions the bot is asking for. Confirm View Channels, Send Messages, and Read Message History are checked, then click Authorize.
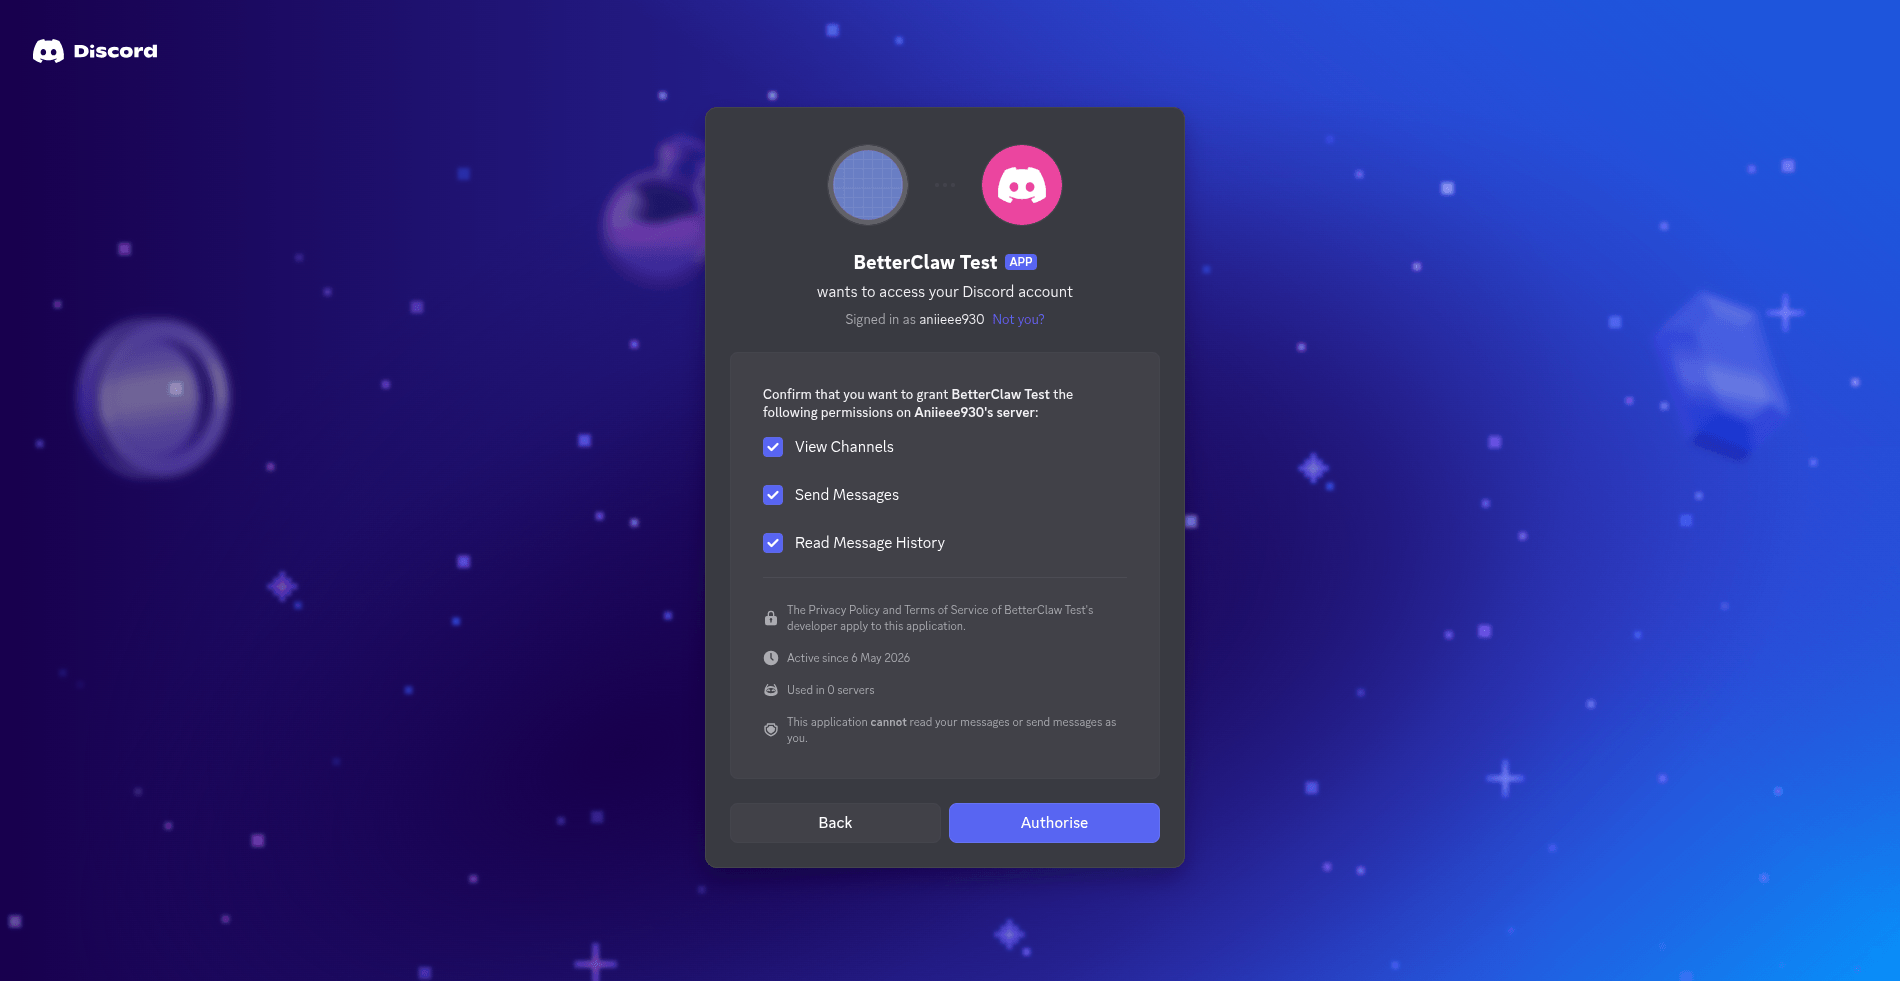
You will see a green "Success!" page when authorization completes. The bot is now in your server.

Step 7: Test Your Agent
Open Discord, go to the server where you just added the bot, and find any text channel where the bot has access.
There are two ways to talk to your agent:
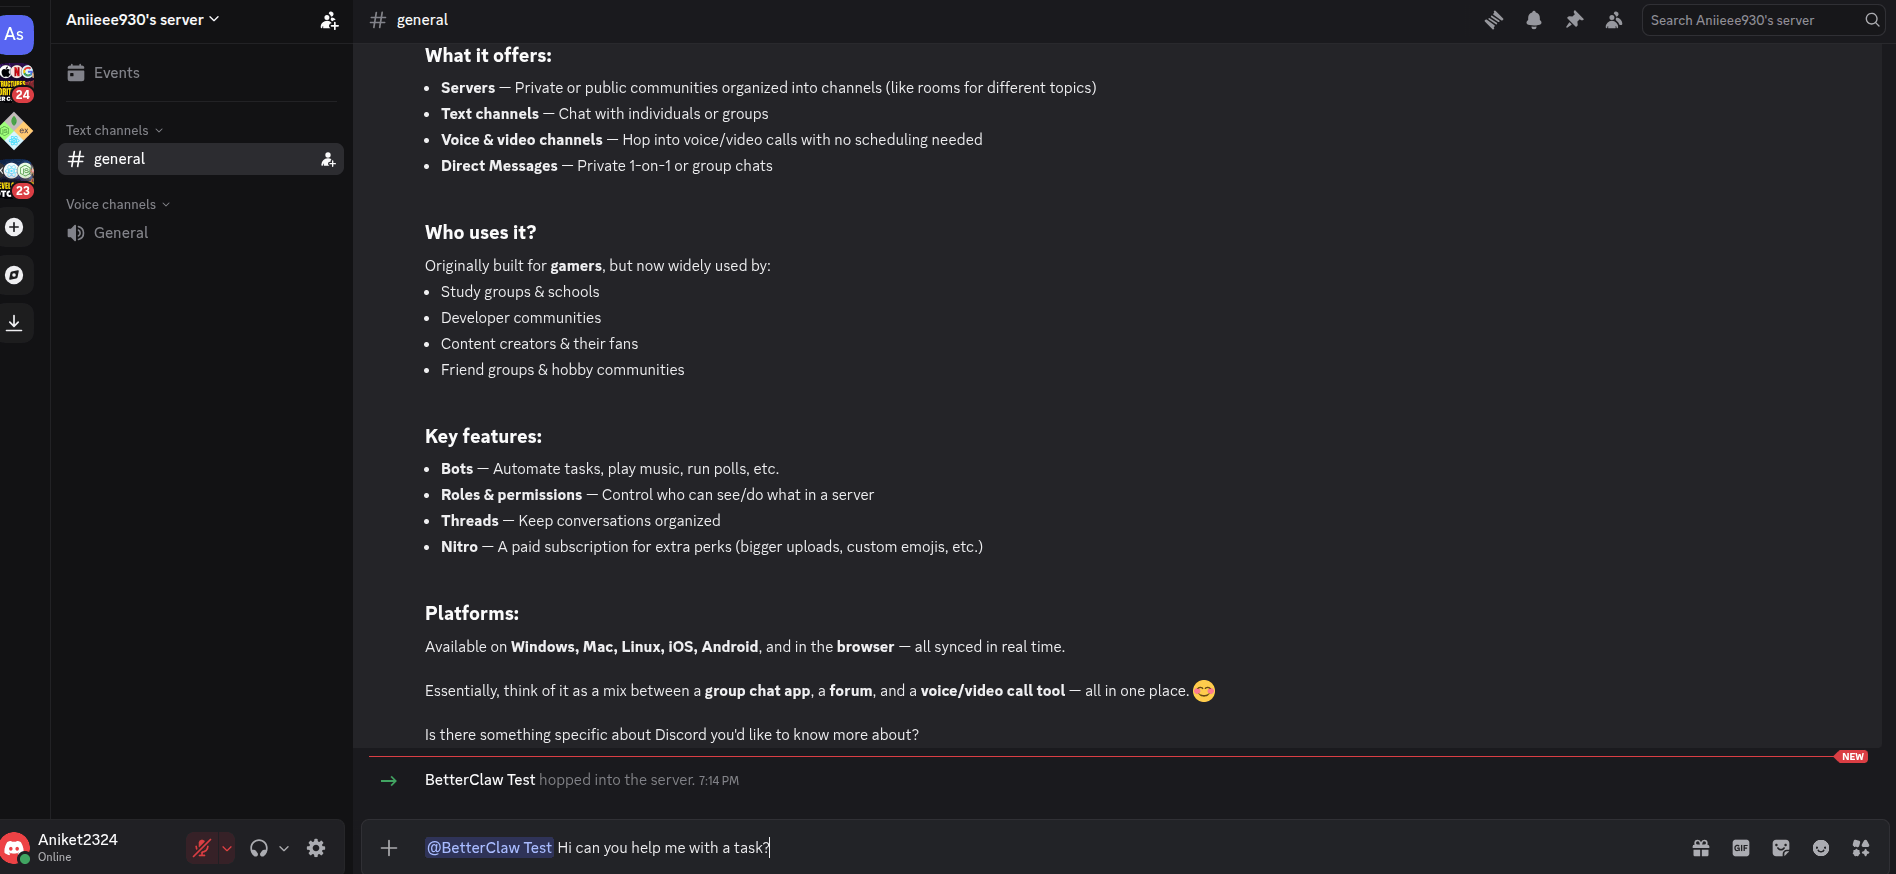
Mention the Bot in a Channel
Type @YourBotName followed by your message. For example:
@YourBotName what does our refund policy say?The bot will show "is typing..." and reply in the same channel.
Send a Direct Message
Click the bot name in the member list, then send it a DM. Direct messages do not need an @-mention. Just type your question and the agent will respond.
If the bot does not respond, the most common cause is that Message Content Intent is still off. Go back to Step 3 and double check.
Make It Look Like Yours
By default, your bot uses the generic Discord placeholder icon. To brand it, go back to the Discord Developer Portal, open your application, click General Information in the sidebar, and upload an App Icon. The recommended size is 1024x1024 pixels.
You can also add a description, banner, and tags here. Discord propagates the icon to your bot within a few minutes.
Common Questions
Can one bot serve multiple agents?
No. Each Discord bot connects to exactly one BetterClaw agent. If you want different agents for different use cases, create a separate Discord application for each one.
Can one bot be in multiple servers?
Yes. Once your bot is connected to BetterClaw, you can add it to as many Discord servers as you want using the same install link. The same agent will respond across all of them.
What happens if I reset my bot token in Discord?
Resetting the token in Discord invalidates the one stored in BetterClaw. Your bot will go offline. You will need to copy the new token, go back to the BetterClaw Integrations page, click Edit on the Discord card, and paste the new token. BetterClaw will detect the connection failure and show a reconnect prompt on the dashboard.
Does BetterClaw support slash commands?
@-mentions and direct messages are supported today. Slash commands are on the roadmap.
How do I disconnect the bot?
On the Integrations page in BetterClaw, click Disconnect on the Discord card. This stops the bot from responding. To remove the bot from your server entirely, kick it from Discord like you would any other member. To delete the application permanently, go to the Discord Developer Portal and use Delete App on the General Information page.
My bot has reached 75 servers. What happens next?
Discord requires bot verification once your bot joins 100 servers. Verification is also required to keep Privileged Gateway Intents like Message Content Intent at that scale. The application is filed by you, the bot owner, through the Discord Developer Portal. Plan for this if you expect rapid growth. Discord typically takes a few weeks to review.
Troubleshooting
Bot is online but does not reply to mentions
Ninety percent of the time, this is the Message Content Intent. Reopen the Discord Developer Portal, go to your app, click Bot, scroll to Privileged Gateway Intents, confirm Message Content Intent is on, and save. Then send a fresh message in Discord.
Bot is offline (grey dot, no Online status)
The token is probably wrong, expired, or has been reset. In BetterClaw, click Edit on the Discord card and paste a freshly generated token. If you have not reset it, also check that the bot has not been disabled by Discord for Terms of Service violations.
Bot does not appear in the server picker on the OAuth page
You need Manage Server permission on the server you are trying to add the bot to. Ask the server owner for that permission, or have them install the bot using the same link.
Bot replies in some channels but not others
This is a Discord channel permission issue, not a BetterClaw issue. In Discord, right-click the channel, choose Edit Channel, then Permissions, and confirm the bot or its role has View Channel, Send Messages, and Read Message History allowed.
"Connect" button stays loading or shows an error in BetterClaw
The token was likely copied incorrectly, or contains a trailing space. Reset the token in Discord, copy it cleanly, and try again. Tokens never contain spaces or line breaks.
Quick Reference
| Step | Action | Where |
|---|---|---|
| 1. Open Discord integration | Click Integrations in sidebar | BetterClaw > Integrations |
| 2. Create Discord application | Click New Application, name your bot | discord.com/developers/applications |
| 3. Enable Message Content Intent | Toggle on, save changes | Developer Portal > Bot > Intents |
| 4. Copy bot token | Reset token, click Copy | Developer Portal > Bot > Token |
| 5. Paste token into BetterClaw | Pick agent, paste token, set access, Connect | BetterClaw > Connect Discord Bot modal |
| 6. Add bot to your server | Pick server, authorize permissions | Discord OAuth link from BetterClaw |
| 7. Send a test message | @-mention or DM the bot | Discord server or DM |
Related Documentation
- How to Generate a Telegram Bot Token
- How to Integrate Telegram with BetterClaw
- How to Install Custom Skills
Need more help? Email hello@betterclaw.io or open the chat widget in your dashboard.